#
HTPC
A home-theater PC (HTPC) is a system specifically designed to host/stream media, such as anime TV shows and movies.
There are plenty of reasons you may want to consider using a HTPC over a smart TV or other premade TV box, such as bad subtitle rendering, poor software support, or limited filtering and upscaling options.
If you are on a strict budget ($50 or less), we suggest getting an Amazon Fire TV Stick 4K Max, as most PCs at this price will provide a suboptimal experience.
#
Specifications
There are two main things to consider when building an anime HTPC: the
#
GPU
Generally, a discrete graphics card (dGPU) will almost always be better than the integrated option (iGPU). However, you may want to consider whether your home-theater setup will necessitate one if you're on a tighter budget:
A dGPU is a dedicated piece of hardware which will be used to handle video decoding. Cards in this category are usually from AMD or NVIDIA.
You may want to consider a dGPU if:
- You plan to use shaders
- You want to use filters like debanding
- You have a high-resolution display (e.g. 2160p/4K or higher) and want to upscale
An iGPU is an integrated piece of hardware on your
You may want to consider an iGPU if:
- You are on a tighter budget
- You want a smaller computer/footprint
- You have a lower-resolution display (e.g. 1080p) or plan to send your high-resolution display a lower-resolution signal (e.g. 2160p/4K -> 1080p)
#
CPU
Once you've decided on a type of
For most budget-friendly setups, we recommend picking up and repurposing a used/refurbished small form factor office machine, such as a Dell OptiPlex, Lenovo ThinkCentre, or HP ProDesk. These can be commonly found on sites like eBay at good prices.
Below are some examples of good candidates for HTPC setups to help you determine a good system:
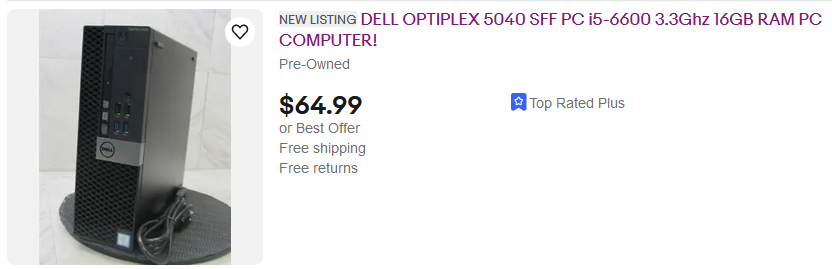
This is an example of a good option to choose for your HTPC. As shown, this machine includes a capable CPU, plenty of RAM preinstalled, and an SSD. It is only missing a dedicated graphics card.
You should also keep your eyes peeled for machines that have a dGPU preinstalled:
If it includes a dGPU, you might not need to find one for your HTPC. Check to see beforehand if it can handle the various codecs/video you plan to run on it.
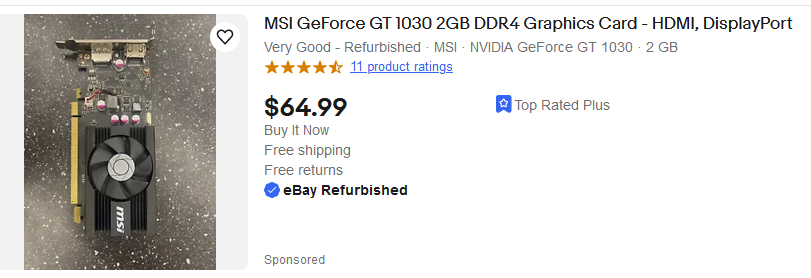
Once you have picked a machine, you can move onto picking a GPU. We recommend choosing relatively recent, low-powered graphics cards as this will allow you to handle most modern shows without issue. Some examples of popular budget cards are:
- AMD Radeon RX 550
- NVIDIA GT 1030 (GDDR5)
- NVIDIA Quadro P1000 Preferred for 4K/HDR Mini DP to HDMI adapter required
The most important factor to consider when choosing a GPU is the video decoder hardware and its supported resolutions.
Lower quality GPUs will often use lower quality fans or lock them to run at high speeds. This can result in unwanted noise, which may impact your listening experience.
- For AMD, look up the card on TechPowerUp and search for the Unified Video Decoder version. Check this number here to see if it supports your codecs
- For NVIDIA, see their Video Encode and Decode GPU Support Matrix -> NVDEC
Small form factor machines will require a low-profile GPU and bracket. Make sure to double-check the height of the card prior to installation, as passively-cooled cards tend to use larger heatsinks that may not fit in your case.
If you are choosing to use an iGPU for your HTPC, you can also look for MFF or micro desktops. These machines will have a smaller footprint and are very quiet. Due to their size, however, they will not have room for a dGPU if you plan to upgrade later on.
Intel is generally the choice of CPU in this category, as there is a much broader selection of processors with integrated graphics. Additionally, you can take advantage of Intel Quick Sync Video for hardware decoding media.
We recommend choosing 7th Generation Intel processors or newer to support playing the latest video codecs. See the full list of codecs supported by various Intel generations.
Avoid systems running 6th Generation Intel processors or older. These CPUs are known to not include proper support for HEVC content and encounter issues hardware decoding, and software decoding will have a performance impact on subtitles.
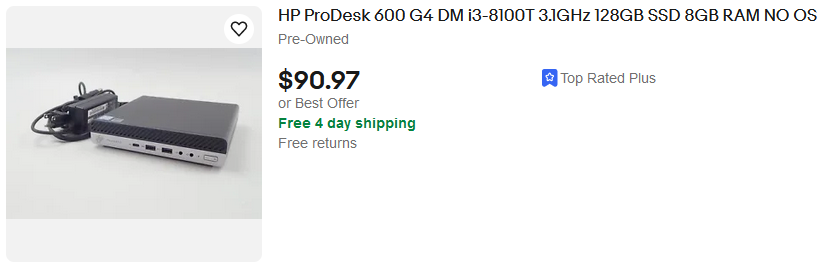
This is an example of a good option to choose for your HTPC. As shown, this machine includes a capable CPU, decent amount of RAM preinstalled, and an SSD. This is an ideal candidate if size is a concern.
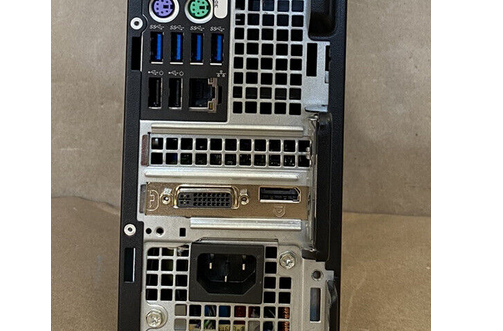
Whether your system has an iGPU or a dGPU, you may run into limitations with their I/O. Most office equipment such as Quadro GPUs and ThinkCentre PCs will omit HDMI. In these cases, you will need an active DisplayPort to HDMI adapter. Improper adapters may be limited to 4K 30Hz or not support HDR. The following adapters have been verified to support 4K 60Hz with HDR, however any adapter labeled as such should work.
- Amazon Basics DisplayPort (4k@60Hz) to HDMI Female Converter
- BENFEI Mini DisplayPort to HDMI, 4K@60Hz Active Mini DP to HDMI Adapter
#
Operating System
#
Windows
For most HTPC users, Windows is the recommended operating system.
#
Linux
HDR is not supported in X11. Wayland has experimental support for HDR, but it requires some configuration to work with MPV.
If you plan on playing HDR content, you will probably need to use Kodi's built-in player.
Linux is another common option for HTPCs. If you chose to go down this route, most of the setup remains the same, however file paths will be different.
#
Player
#
mpv
mpv is the most recommended media player for HTPC setups.
#
Config
Depending on your hardware, the example mpv configs may not suit your hardware. Below is an example configuration catered specficially towards HTPC setups:
mpv.conf config
# General
ontop=yes
profile=high-quality
blend-subtitles=video
hwdec=auto-copy #If you aren't using the DRC Filter, you can change this to auto-safe for better performance.
gpu-api=vulkan
target-colorspace-hint=yes

# Deband
deband=no
deband-iterations=2
deband-threshold=64
deband-range=20
deband-grain=64

## Language Priority

# Sub
# Add enm before eng for honorifics
slang=eng,en
alang=jpn,ja

# Dub
# Uncomment this section to prefer English dub with subtitles for English dub
#slang=zxx,eng,en
#alang=eng,en
#subs-with-matching-audio=forced

[SDR]
profile-cond=p["video-params/gamma"] ~= "pq" and p["video-params/gamma"] ~= "hlg"
vo=gpu

[HDR/DV]
profile-cond=p["video-params/gamma"] == "pq" or p["video-params/gamma"] == "hlg"
vo=gpu-next
target-contrast=inf ##inf is for OLED, for LCD get the contrast value from rtings or similar
target-trc=pq
target-prim=dci-p3
target-peak=700    ## If you have an HDR display, adjust this to the 10% peak

## Above makes use of vo=gpu-next for HDR Content, and vo=gpu for SDR. This is a requirement for blend-subtitles=video
## blend-subtitles=video is used to avoid performance issues with rendering 1080p subtitles at 2160p.


[drc]
vf-toggle=scale=in_range=limited:out_range=full,setrange=limited
deband should be toggled as needed and is set to off in the config. See how to bind debanding to a hotkey.
#
Scripts
Most modern TVs are capable of changing refresh rate to match the frame rate of the content, which removes judder.
However this is not default behaviour in Windows, and as such we recommend change-refresh, a script that automatically accomplishes this.
Make sure you set auto to yes for automatic switching in changerefresh.conf.
Some users experience issues with the change-refresh script, such as the refresh rate not changing. If this is the case, you can try setting detect_display_resolution = false and manually setting original_width and original_height to your respective display's specifications in changerefresh.conf.
nircmd is required for change-refresh. Download and copy nircmd.exe to your Windows folder (i.e. C:\Windows).
MPV cannot natively switch into HDR mode when playing HDR content, so we recommend mpv-display-plugin alongside hdr-toggle.lua, which will add this functionality.
Simply download the latest display.zip release and extract it into your MPV scripts folder, then on the hdr-toggle.lua page click Download ZIP, open the folder inside, and drag hdr-toggle.lua into your MPV scripts folder.
#
Kodi
For HTPC setups, we recommend using Kodi.
Kodi is a home-theater software which neatly displays your library and allows for easy navigation with a remote, while utilising mpv as the player for playing content.
#
Library
Kodi offers many ways to import your content, with the easiest being the PlexKodiConnect addon, a plugin that allows you to access your existing Plex library through Kodi.
Alternatively, you can use network shares like SMB or local drives such as an internal/external HDD.
#
mpv External Player Config
After installing Kodi, go to %appdata%\Kodi\userdata, make a file called playercorefactory.xml and paste the following into it, replacing Path\To\mpv.exe with the location of your mpv.exe:
playercorefactory.xml
<playercorefactory>
  <players>
    <player name="mpv" type="ExternalPlayer" audio="true" video="true">
      <filename>Path\To\mpv.exe</filename>
      <hidexbmc>true</hidexbmc>
      <hideconsole>false</hideconsole>
      <warpcursor>topright</warpcursor>
      <playcountminimumtime>1200</playcountminimumtime>
    </player>
  </players>
  <rules action="prepend">
    <rule filetypes="*" filename="*" player="mpv"/>
  </rules>
</playercorefactory>
#
Control
Using a keyboard and mouse to control your system is not optimal for home theater usage. Instead, you should consider using an alternative input device:
- CEC Adapter Recommended
- IR Remote
- USB Remote
- Game Controller
- Combo keyboard and trackpad devices
#
CEC
Although the most expensive option, a CEC adapter is one of the best ways to control your HTPC. This allows you to use your TV's OEM remote control to send commands to your computer, including but not limited to directional pad, select button, color buttons, and more, depending on your specific make and model of TV.
We recommend using the Pulse-Eight CEC Adapter, which can often be found cheaper on second-hand marketplaces.
Although not officially rated to do so, the Pulse-Eight CEC Adapter has been proven to somewhat work with 4K 120Hz signals, though your milage may vary.
Pulse-Eight hosts builds for libCEC on their website. libCEC includes the cec-tray application, a tool that converts CEC button presses on a comapatible remote to keyboard commands in Windows, which can be used to control media player applications such as Kodi and mpv.
Once you have installed libCEC, open cec-tray. This program is used to pass CEC commands as keyboard inputs. The following settings should be changed prior to use:
- Set "HDMI port of the TV" to the port that the PC is connected to on the PC.
- Check "Minimise after connecting to the adapter"
- Check the firmware version. If you encounter any issues, updating the firmware may help, though some claim that the newer versions firmwares break functionality, so your mileage may vary.
- In the "Foreground Application" tab, you can press a button on your remote to see what it is currently bound to, and change it. The later steps of this guide assume all default bindings, so keep that in mind when changing them.
- Locate your libCEC installation folder. By default, this can be found in
C:\Program Files (x86)\Pulse-Eight\USB-CEC Adapter\x64\netfx\ - Create a shortcut to
cec-tray.exe. Place this shortcut in your startup folder- Press
Win+Rand typeshell:startupto find your startup folder - You can also manually go to this folder by going to
C:\ProgramData\Microsoft\Windows\Start Menu\Programs\Startupin File Explorer
- Press
#
CEC with Media Players
To add CEC support to mpv, add the following lines to your mpv's input.conf:
input.conf config
# Left D-pad - Seek backward by 5 seconds
KP_LEFT seek -5
# Right D-pad - Seek forward by 5 seconds
KP_RIGHT seek 5
# F2 - Toggle debanding
F2 cycle deband
# F4 - Cycle through subtitles (backwards)
F4 cycle sub down
# F1 - Cycle through audio tracks
F1 cycle audio
# F3 - Toggle the DRC filter
F3 apply-profile drc
# Select - Pause/play
ENTER cycle pause; show-text "${time-pos/full}"
# Backspace - Exit mpv
BS quit
Kodi includes support for CEC adapters by default. Unfortunately, this plugin cannot be used to pass CEC commands to mpv.
To disable the plugin:
- Launch Kodi
- Go to Settings > System > Input > Peripherals > libCEC
- Disable the plugin
- Relaunch/exit Kodi
The cec-tray application will still automatically detect kodi.exe and quit to prevent a conflict with the plugin. To avoid this, rename kodi.exe (by default, this can be found in located at C:\Program Files\Kodi) to another name, such as kodi1.exe. This will prevent cec-tray from quitting when Kodi is opened.
AutoHotkey is a scripting language for macros. This guide will show you how to use AHK to launch Kodi using your TV remote.
#
Installation
Install v1.1 of AutoHotkey. Follow the on-screen instructions to install AHK onto your system.
#
Script
Create a new text file called kodi.ahk with the following:
.ahk script
$F4::
IfWinExist, ahk_exe mpv.exe
{
    ifWinNotActive, ahk_exe mpv.exe
    {
        WinActivate
        return
    }
    Send {F4}
    return
}

IfWinNotExist, ahk_exe kodi1.exe
{
    Run, C:\Program Files\Kodi\kodi1.exe  ; Replace with the full path if necessary
    return
}

IfWinExist, ahk_exe kodi1.exe
{
    WinActivate
    return
}
Send {F4}
return
Credits to Jimbo for the script.
This script checks if mpv.exe or kodi1.exe are running:
- If they are not running,
kodi1.exeis ran - If they are currently running, the
F4key is passed through to the running program. This allows using the remote to launch Kodi, without sacrificing a button
You will need to modify this code if you want to run something other than kodi1.exe (i.e. you used a different file name for the Kodi executable or want to launch a different program) or listen for a key other than F4.
To run this script, double-click the .ahk file. Alternatively, you can place it in your startup folder to run it automatically when cec-tray starts.
#
IR
Most TVs use or support IR technology for the remote. It’s a cheap and reliable way to send remote signals long distance. There are a variety of methods of using an IR Remote with a PC, including:
- FLIRC Dongle ($23.99)
- Windows MCE Receiver (~$10)
- DIY Projects (~$5)
The FLIRC is the most complete retail product, however all three can be made to work in most setups. However, all three will need a remote to interface with.
Most low end TVs will be using an IR Remote. If there are buttons on the remote that don’t accidentally trigger other functions on the TV, these buttons can be programmed with your receiver. Some higher end remotes, such as the LG Magic Remote can be programmed as an IR Remote for devices like a Cable Box or DVD/BD player. You can take advantage of this feature to have the remote send IR signals that the TV knows are not directed at it. If you don’t have these features on your remote, there are alternative solutions as well. Universal remotes like the FLIRC Skip 1s and Logitech Harmony are fully programmable and able to be used with HTPCs and the rest of your home theater setup simultaneously.
#
Universal Remotes
LG Magic Remotes can ONLY be used with an LG TV. They cannot be used with other TVs.
The LG Magic Remote does not communicate with the TV via IR (except for the power button), however it is capable of emulating IR remotes. Although they do not have any HTPC specific IR codes, we can reuse the IR codes for a Cable Box.
- Open the full settings menu on your TV, and go to General > External Devices > Universal Control Settings.
- Select the HDMI Input that corresponds with your HTPC. In my case, it is HDMI 1. If there are any settings stored there, delete them.
- Select Set-Top Box. The other options (BD/DVD, Home Theater, OTT) are missing some buttons, like CH+/CH-.
- Select any of the service providers in your area. If you have a cable box, pick another brand to avoid confliction.
- During the self test, you can answer "Yes" to all the questions. These buttons will do nothing until you have configured them in your IR blaster.
Your Magic Remote will now emit IR codes as long as the TV is on, and the input is set to the HTPC. Make sure that both of these things are true when trying to configure your IR Reciever, otherwise the remote will not emit any IR.
When binding sleep/wake, you can use the ellipsis button to find the power button. This will allow you to turn the PC on when the TV detects no signal.
Logitech has discontinued all Harmony products and has stopped supporting the software. The software relies on a cloud service to function, and if this cloud service were to go down, you would be rendered unable to change your remote configuration. At the time of writing this guide, ALL Harmony products are still fully functional and have no shutdown date from Logitech
Pros:
- Large community
- Fairly cheap on the used market
- Beginner friendly programming
Cons:
- No offical support
- Reliant on online programming
There are three applications for the Harmony system depending on what generation of remote you have. If you have the Harmony Hub, you need the Harmony app. The other remotes either use the MyHarmony or the Harmony 7.x software. You can see the full compatibility list here.
The FLIRC Skip 1s is a universal remote developed after the discontinuation of the Logitech Harmony. It was designed in such a way that in the event that FLIRC were to go out of business, the remotes will still be fully functional and programmable.
Pros:
- Fully offline operation
- Relatively cheap brand new
- IR learning
Cons:
- Programming software is very buggy
- Not "Scene Smart" in the way that the Harmony is
- Difficult to make custom bindings with FLIRC Reciever
The Skip 1s product page has the downloads for the latest "stable" release, but the forums usually have the latest beta. The program has some profiles for use with the FLIRC Reciever and Kodi, however there is not any simple/obvious way to add a custom keybinding. The simplest way I found was to add a "fake" cable box, add it's bindings to my remote, then on the reciever software bind these "fake" codes to the keys I needed.
#
Recievers
There are two different revisions of the FLIRC dongle. The first generation is in a clear plastic shell, and is no longer supported by FLIRC, however the latest software still is fully functional. The second generation is in a metal and plastic shell. It has the latest firmware updates, and also includes an IR transmitter. This transmitter is only functional through the CLI however, it is not implemented into the GUI. (source)
Download the FLIRC Software from here. The configuration is stored on the dongle itself, so you can configure on one computer then move to the HTPC without the need for the software on both.
The basic usage of the software is as follows:
- Connect the dongle to the PC running the FLIRC software
- Select the type of controller you want to emulate from the Controllers tab. (You can select different buttons from multiple controllers)
- Click the button you would like to bind, then point the remote at the dongle and press the button.
Although the most complete retail product, the FLIRC software is far from perfect. In my experience there are two quirks that you should know to take full advantage of the device.
- The "erase" button at the bottom is unintuitive. If you want to remove a binding, click "erase", then press the button to clear on the remote, not on the screen/keyboard.
- Different buttons with similar meanings on different tabs will do different things. For example, the "Wake" button on the "Full Keyboard" tab will only wake the computer, where as the power button under "Media Keys" is both a sleep and wake button.
The MCE Recievers were designed to only offically work with it's original remote/codes. Most "smart" universal remotes should have codes for the MCE system, including Harmony and Skip 1s. If you have an original remote, or supported universal remote, you can use Advanced MCE Remote Mapper to remap keys.
The (currently unmaintained) EventGhost software is able to read arbitrary IR codes from the MCE reciever, and can be used with any remote. To configure:
- After installation, click File > New to remove the sample configuration.
- At the top of the window, click the "Add Plugin..." button, and add the "Microsoft MCE Remote - Vista/Win7" plugin.
- In the next window, click "Install Service". This is an alternative driver for the reciever that will allow any IR code to be read.
- At the top of the window, click the "Add Macro..." button, but close the configuration window. You should have an "<unnamed macro>". Make one for each button you would like to bind. You should rename it to the appropriate action.
- Press the button you would like to bind. It should show on the left side of the EventGhost window.
- Drag this element to the macro you would like it to activate.
- Click the macro, and at the top of the window click "Add Action...". Add the Window > Emulate Keystrokes action.
- Configure the keystroke you would like to attach to this IR code.
- Click File > Save to save the configuration as XML. EventGhost automatically reopens the previous file on startup.
Once you have configured all the keys, as long as EventGhost is running, the keystrokes should be sent. You may wish to add EventGhost to the startup folder as detailed in the